Showing posts with label Digital Stamps. Show all posts

Sunday, February 2, 2014

Card A Day Blog Post: Invitations

Hi there, I'm here again with another entry for the Card A Day Blog. This week's theme is, Invitations. I already had this card made a while ago, but it was never finished, and I thought it would make a wonderful invitation to a BBQ.


To make my card, I first started off with a 5.5" x 4.25" white card base, then added a piece of patterned paper from " The Guy Stack" from Die Cuts With A View, cut to 5.25" x 4", to the front of the card base.

For my image, I used the digistamp, BBQ Alf, from Digistamp Boutique. I printed it out on white card stock at about 3.5" x 3.5", then cut around the edge. I colored the image with Copic Markers, but since I started this card some time ago, I can't remember the exact colors I used. I matted the image with a piece of green card stock cut just a bit larger than my image. I then adhered my image to the card base. For the message below the image, I used a " You are invited " stamp that I had in my stash, and matted that with brown card stock, and added that under the image.

On the inside, I printed out what the invitation was for, in this case, a Bar-B-Q, the date, time, location, and a space for other information.


I don't know about you, but I'm in the mood for some BBQ now myself...lol! I hope you get a chance to leave me a comment, so I know what you think about my card, I would truly appreciate it. Please stop by the Card A Day Blog every day to see what our designers have created to share with us, and also, if you're into challenges, you might want to check out our monthly challenges, for the chance to win a wonderful prize!


Friday, October 11, 2013

CADB: Patchwork Reindeer

It's time again for another Card A Day Blog entry, and this week's theme is Christmas Animals. I thought this cute little patchwork reindeer, from Clear Dollar Stamps, was just adorable, and I'm sure you'll agree.


For my patterned background paper, I used the diagonal blue and white striped paper from the DCWV Christmas Ultimate Scrapbook Kit in a Stack, that I purchased a few years ago, so I'm not sure if it's still available anymore. I cut that piece at 5.25 x 4". I also used a dark blue with snowflakes patterned paper from the same pack, cut to 4.5" x 3.5", and used it to mat my image and ribbon.

For my image, I printed my image at about 2" x 3", on a piece of white card stock, then trimmed it fairly close to the image. I then colored the image with my Copic markers, BV00, YG41, B23 and B12. I adhered the image to the left side of the mat.

On the right side of the mat, I cut a piece of light blue card stock paper at 1" x 3.5", added a piece of white card stock, cut slightly smaller than the blue piece, adhered that piece to the blue piece then adhered both to the right side of the mat. I added a piece of light blue diamond patterned ribbon, from Really Reasonable Ribbon, with wedges cut on the ends, and added a piece of rick-rack to the middle of that. On the inside of the card, I stamped, " Merry Christmas" from one of the stamps I have in my stash.

Thank you for stopping by, I hope you enjoyed my latest creation, and that you leave me a comment and let me know what you think. Be sure to visit the Card A Day Blog each day for some wonderful card making inspiration. Also, if you like challenges, go check out our monthly challenge for a chance to win a great prize!


Monday, July 22, 2013

Really Reasonable Ribbon Challenge #76 'Sizzlin' Summer Colors & Ribbon' Theme

Hello everyone. I have decided to enter this Really Reasonable Ribbon challenge, this will be my first time entering one of their challenges.


When I thought about the theme for this challenge, I thought about this digital stamp, Funny Sunflower, that I had purchased a while back from The Paper Shelter. I printed the image out using my printer on white card stock paper, colored it with Copic markers, then cut around it. I added Mod Podge Dimensional Magic to the middle of the sunflower, the ladybug, and the snail. I used a polka dot designed paper for my first layer and then added an embossed piece of light green paper that I embossed with the swirls Cuttlebug folder. For the mat for my flower, I cut out a piece of light orange card stock using a die from the Spellbinders Romantic Rectangles die set. For the ribbon, I cut pieces of yellow and orange ribbon from the Really Reasonable Ribbon, Diamond Satin Assortment Primary pack, cut a "V" shape at the end, then added Bright Apple Circus Dots ribbon, also from RRR, cut the same way, to the top, then added them to my card. On the inside, I stamped, " Thinking of You ", using a stamp I had in my stash.

I really love the way this card turned out, if I must say so myself. I will be sending this card to one of my sister's that I'm sure will enjoy receiving it. I also made a few more to add to the Operation Write Home box that I'm currently working on filling.

Sunday, February 3, 2013

Card A Day Blog Post: Invitations

Thank you for stopping by today, It's my turn again to post on the Card A Day Blog. This week's theme is " Invitations".


For my invitation, I decided to make a single page card, instead of a folded one. For my image, I chose a digital stamp from Bugaboo Digi Stamps, Party Pig Trio. When I saw this digi stamp, I thought it would be perfect for this project.

I used one of my scrap book programs on my computer to size the image, then I used the text tool to add the title, date, time and place. I then printed the image on white card stock, then trimmed it to 4"x 5". I colored the rest of the image with Copic Markers, RV10 and R22 for the pigs, and for the balloons, hats, and confetti, I used, B24, B28, G05, G14, R05, R29, Y08 and YR07. 

To finish my card off, I adhered my image to a piece of 4.25" x 5.25" red card stock. The back of my invitation was left blank, but it could be used to add some other information, such as directions, etc.

I hope you like my little party invitation, and if you get the chance, please leave me a comment, and let me know what you think of it. Be sure to visit the Card A Day Blog every day, for lots of great card ideas, and be sure to check out our monthly challenge for a chance to win a great prize!


Friday, September 9, 2011

Autumn Owl

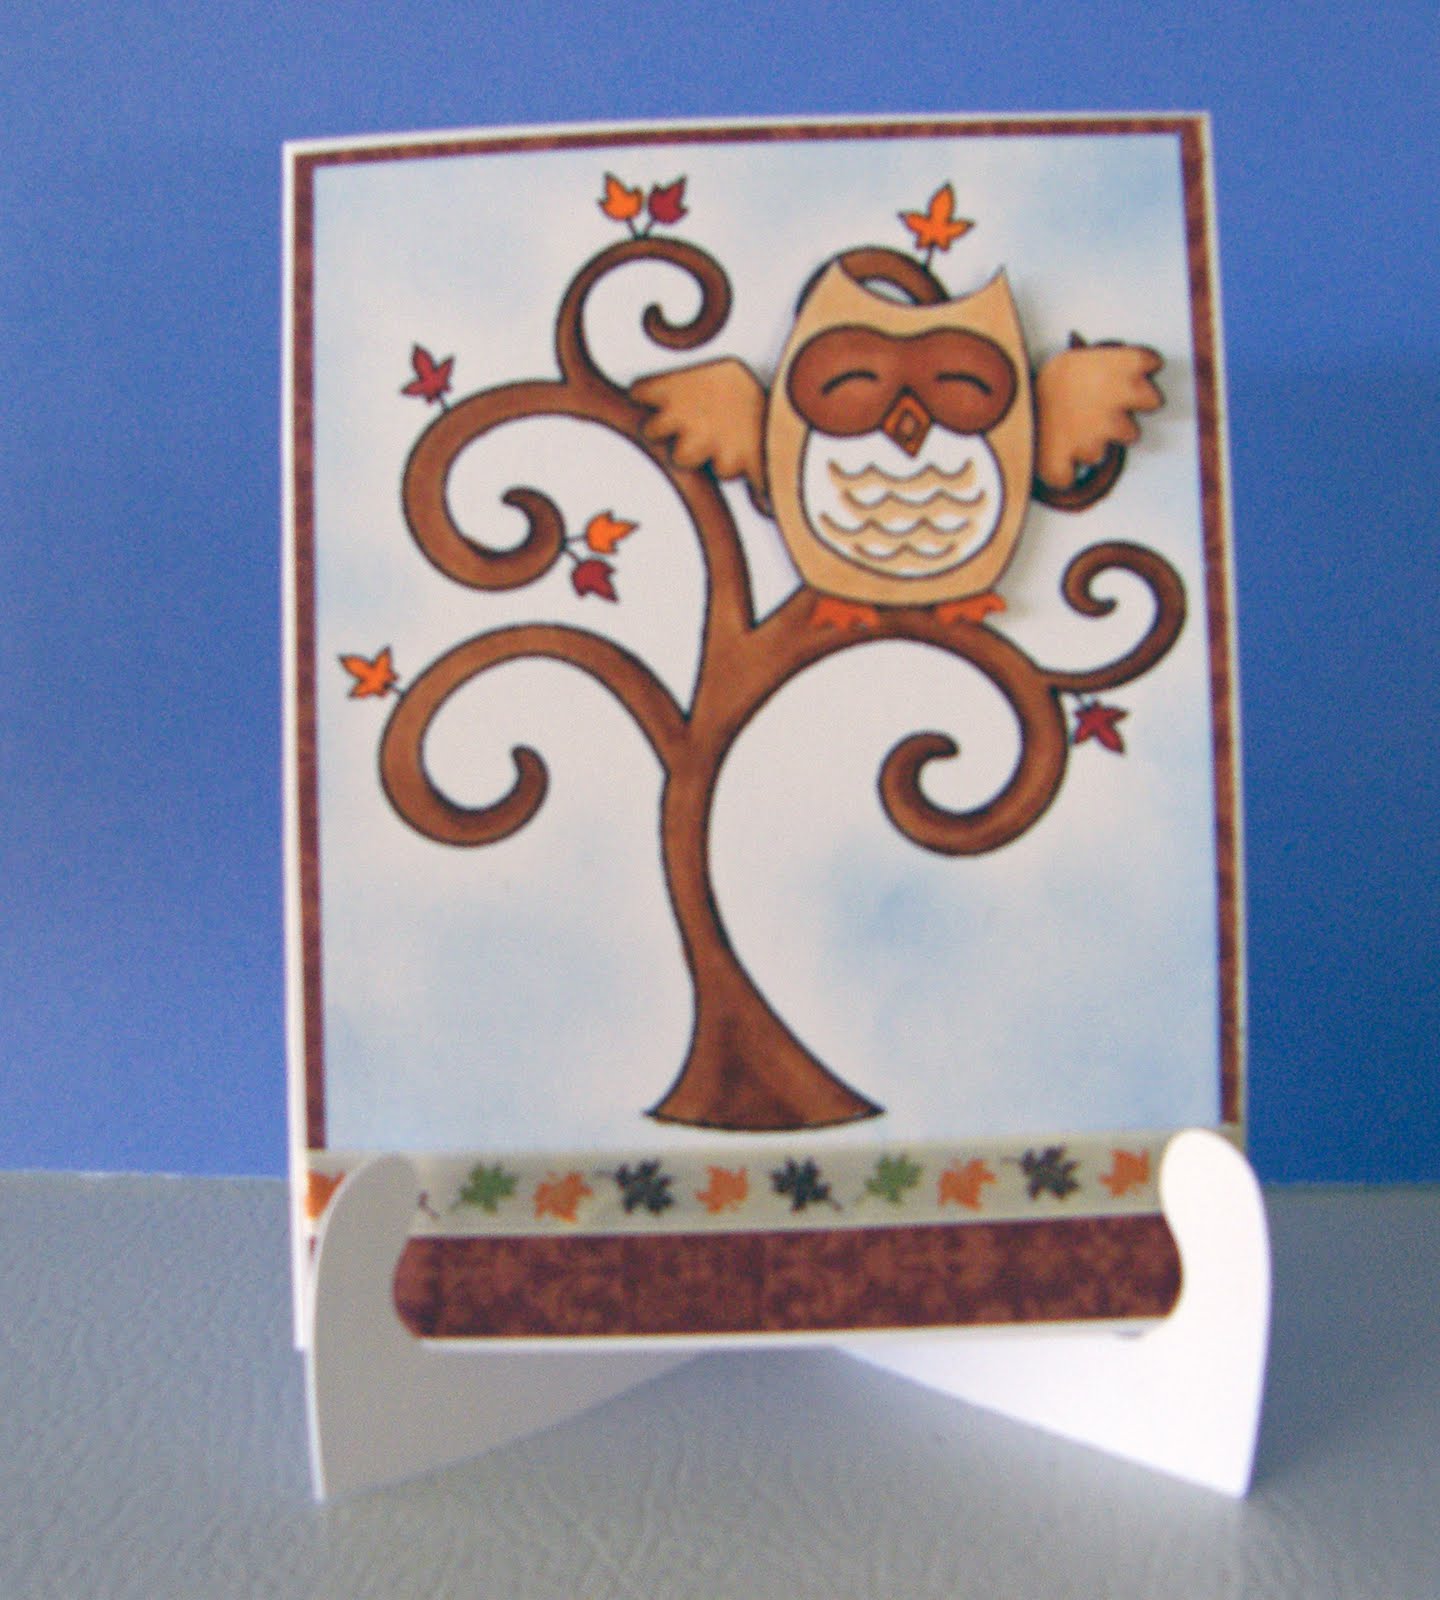
Hi everyone, I hope your having a wonderful weekend so far. I now have the pleasure of being one of the designers in the Card A Day Blog,  where I have the pleasure of designing cards and posting them for others to enjoy. Every day there will be a new card posted by one of the designers, and each week, there will be a new theme. This weeks theme is Owls, and since I love owls, I had to get in on this one. This is my first post for the group, and I'm very excited.

The card I decided to make is made from digital stamps from Tiffany Doodles Digital Stamps and What nots . When I saw this little owl, and some of the card samples that where made from these stamps, I thought they would be perfect for this project.


The materials I used for my card are:
Copic Ciao Markers # E37 and E35 for the tree trunk, and E53, E33 and E35 for the owl.
8.5 x 5.5 inch piece of white card stock, folded in half for card base.
5 4/8 x 4 1/8 inch background paper from the DCWV Amber Autumn Stack
5 inch piece of fall themed ribbon.
Color Box Petal Point pigment ink, dark blue petal pad.
Foam Squares
Digital images from Tiffany Doodles Digital Stamps and Whatnots


First, I printed my digital images on white card stock, the tree is approximately 4.5 x 4 inches, and the owl is 2.5 x 1.75 inches. I then colored the digital stamps.For the tree, I used Copic Ciao Markers # E37 and E35 for the trunk, and E08 and YR16 for the leaves. I used the dark blue ink on the Color Box pinwheel to ink around the tree using a small ink dauber.  For the owl, I used Copic Ciao Markers # E53, E33 and E35. I then cut out the owl, applied two foam squares to the back, and placed him in the tree. I then attached the tree and owl on my piece of background paper, placing it just below the top edge of my background paper. Then, I attached my piece of ribbon along the bottom of the tree. Last, I attached the card front I just created to the front of the card base.

I really hope you like this little card I made, as I really enjoyed making it. Please leave me a comment, and let me know what you think.